
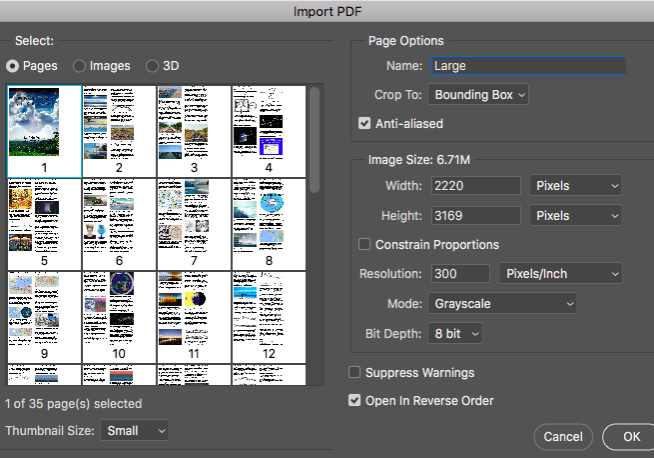
Photoshop is not only a powerful image editing tool but also capable of editing PDF files. Discover everything you need to know about handling PDFs in PS.
Shotkit may earn a commission on affiliate links. Learn more.
It might be surprising to learn that Photoshop is not only a powerful image editing tool but also capable of editing PDF files.
Photoshop might not be as proficient as Adobe Acrobat, but it has several amazing editing functions for editing PDF documents.
If you don’t own Adobe Acrobat it is worth learning how to import, edit and save a PDF document in Photoshop.
Read on to learn more about Photoshop PDF editor capabilities, so you can use it to edit PDF files.
Don't Have Photoshop?

Download Adobe Photoshop
Download the latest version of Adobe Photoshop to follow along with this simple tutorial.
Start a free 7-day trial today
Table of Contents
To Open a PDF file go to Open > File and locate the PDF document you wish to edit.
The Import Dialogue Box will open, giving you the necessary extra options needed when importing a PDF File.
To import the PDF document successfully, select the Pages option, if you select Images, Photoshop will open only the image components of the PDF document.
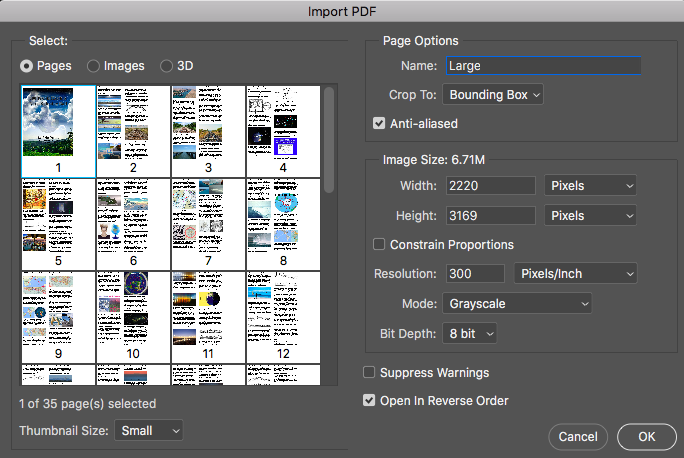
You can open just one page of the PDF file or a few.
To select more than one page of the PDF document, hold the Shift Key, and click with your cursor to select extra pages.
In the Dialogue box, you can select editing options before you open the PDF File.
In the Crop to Box, choose one of the following options.
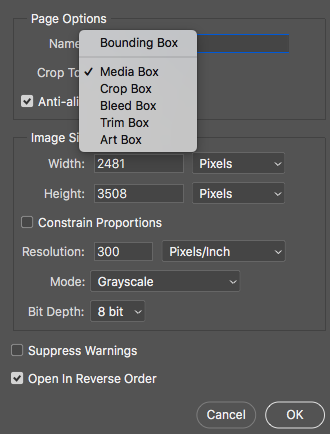
Media Box– Specifies the final page dimensions.
Crop Box – Specifies the section that prints
Trim Box – Final size of the page after printing.
Bleed Box – Similar to the Trim box but with extra space.
Art Box – Specifies the content of your page with an extra margin.
If you are unsure which suits the purpose of the PDF File, select Media Box, the rest are mostly used for commercial printing.
You can change the dimensions of your PDF document by adapting the measurements under Image Size.
In the Mode box, you can select further editing functions and use Grayscale if you want a black-and-white document.
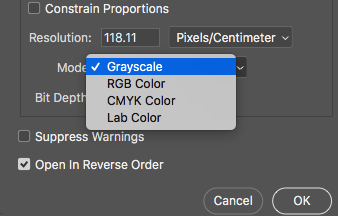
For color, choose the option most compatible with your printer RGB, CMYK or Lab Color.
Editing your PDF document in the Dialogue Box before you open it will save you time, allowing you to edit the size and bounding box of all of the PDF pages at the same time.
Now Press Ok, and all the pages you have selected will open as separate Photoshop Files.
Now that you have your page or pages open in Photoshop, you can begin editing.
You might find it use full to create a grid and use the zoom tool when editing PDF files.
Certain components of PDF documents could be locked, and Photoshop will not permit you to use tools such as the eraser tool and brush tool.
When you attempt to use a restricted tool, a window will pop up informing you that the target layer is hidden.
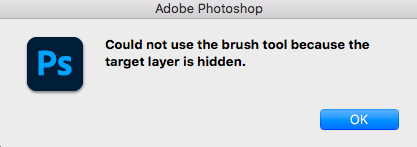
However, don’t fret there are still ways around this – one is to use a Clone Stamp Tool.
Another way to edit features of the PDF is by creating an extra Layer in the Layers Panel, and then using this to paint over unwanted areas of the PDF file.
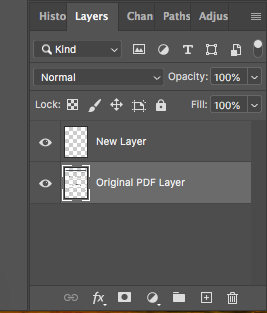
When you have the PDF edits you require, you can then merge the extra Layer with the original PDF File by selecting both layers in the layer panel and Pressing E.
Other than this small hitch, you can pretty much make any PDF edits you wish, including adding text and images.
Text, images, and shapes added to the PDF in Photoshop will need to be merged with the PDF page before saving the document.
Now the important part: how to save your PDF, you don’t want to save it as separate pages but as one complete PDF document.
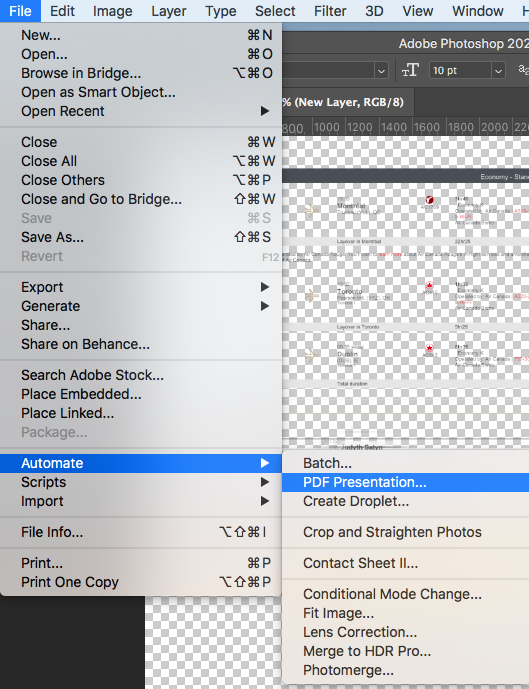
To save your separate pages as a PDF document, go to File > Automate > PDF Presentation.
A Dialogue Box will open, to select your document, click Add Open Files on the left-hand side of the box.
The pages of your PDF document will be displayed in the box below; you can reorder the PDF files by dragging them up or down.
The top file will be the first page, and the bottom file will be the last file.
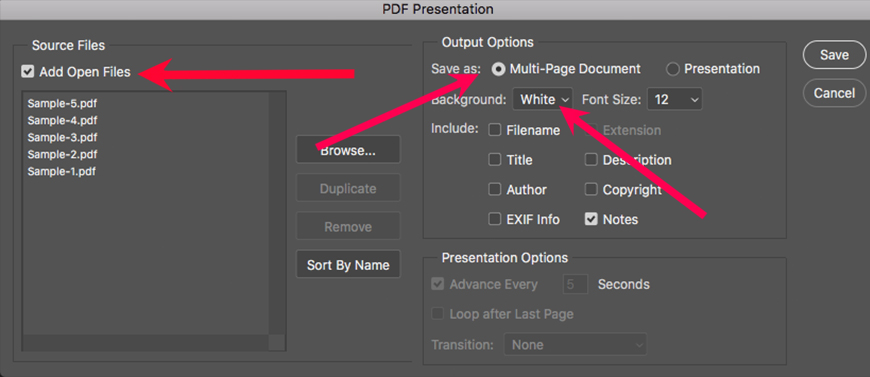
Beside Save as, select Multi-Page Document.
If your Photoshop PDF had a transparent background, select a background color in the Drop Down Menu beside Background.
For A4-sized PDF files, select 12 for Font Size.
Then press Save.
Nope, it’s not finished yet, another Dialogue Box will appear for any additional final adjustments.
Normally the default Photoshop settings are suitable for most PDF documents.
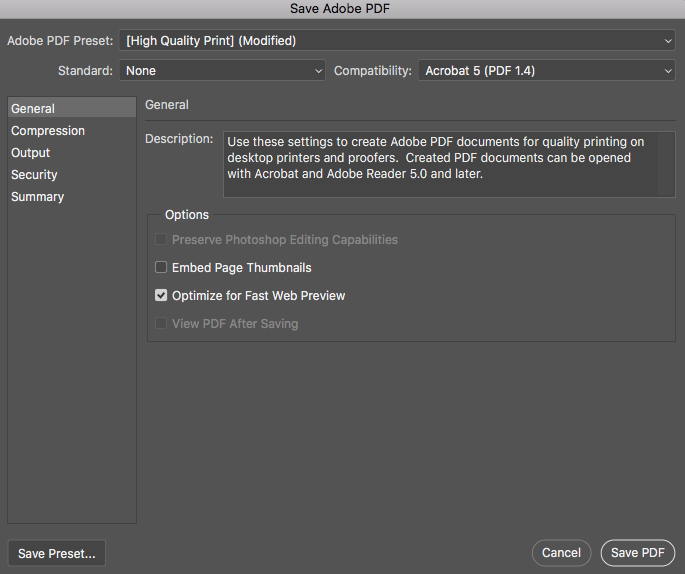
Select High-Quality Print (Modified) beside Adobe Photoshop Presents.
Beside the Standard box, select None.
For Compatibility, choose an option that is compatible with older and newer software.
Leaving all the other settings as default, you can press Save PDF.
You now have an edited PDF saved straight from Photoshop.
Saving an editable PDF in Photoshop is a simple process.
In the Top Menu Bar, navigate to File > Save as.

From the drop-down menu beside Format in the Dialogue Box select Photoshop PDF.
Then hit Save, it’s that easy.
If you’d like to have some more fun manipulating your images, check out how to Flip Images in Photoshop.